
I've been promising this post since BK's Rainbow Party. And while I can't promise, it's the best DIY you've ever seen, I think it will be good enough to get you a yard full of balloon topiaries at your next party. Here's what you'll need: conduit (we used 8 foot sections, I think they come in 10 foot sections, but Allen cut them because they were too high to begin with) tape balloons tulle Start by blowing up two balloons, it's easier to tie the balloons together before they are tied separately. Simply tie a know in the two balloons to keep them together. Continue this process with 5 sets of balloons (10 total balloons). After all of your … [Read more...]
DIY Tissue Paper Tassel Garland
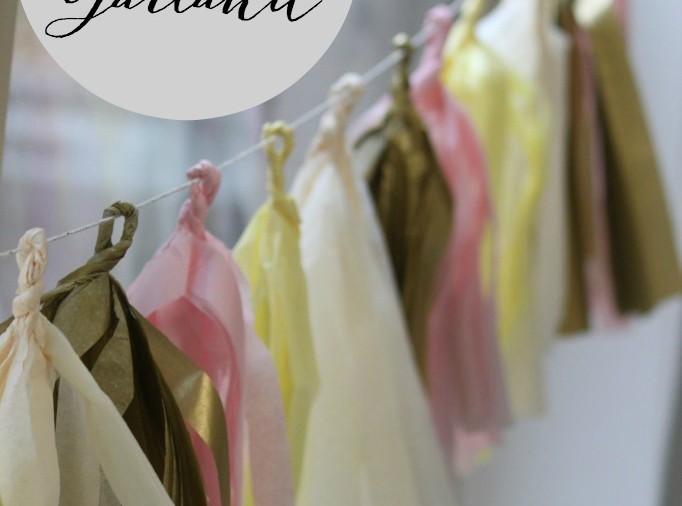
I know you've probably seen tassle garland all over Pinterest lately. Actually, I've been seeing it for awhile, but I was never quite brave enough to take the plunge. But, my mom and I love a good project, and we thought this might be a fun one to spend some time in the craft room learning how to make. And spend some time we certainly did! The first set took us a fair amount of time to complete. By the second set, we were much faster and more efficient thanks to a few changes we made during the process. And last week we threw together a third strand rather quick! I know there are a million different tutorials you can find to make this, but I thought it would be helpful to share the method … [Read more...]
Create Your Own Bag Toppers using PicMonkey
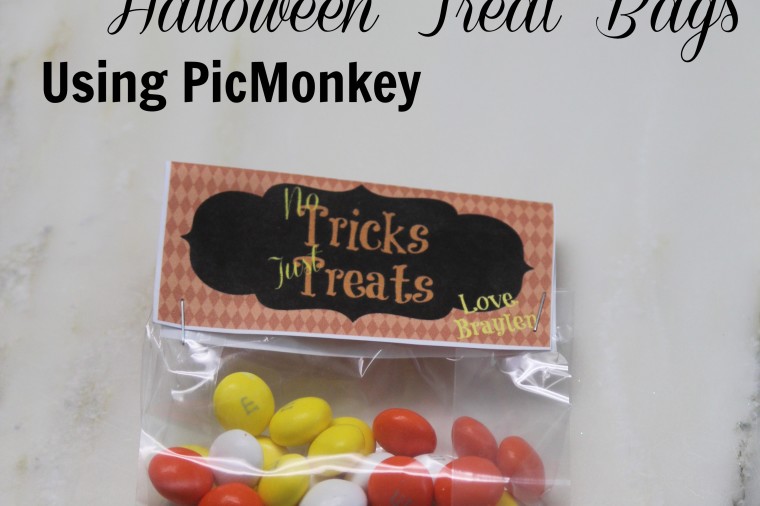
Halloween is approaching fast and it hit me during dance class on Tuesday night that I needed a quick treat for the Halloween party. Usually when I post these tutorials, I get a lot who has time for that? I'm here to tell you, this is super quick and easy. Best of all? It's free! That's right, you don't need fancy software, you can use the PicMonkey website and create your own personalized treat bag labels. Start by heading over to PicMonkey. Once you get there, click on the collage icon at the top of the screen. It might ask you to pick an image from your computer to proceed, just go ahead and do this, to get the collage open. It will open up a collage like the one you see … [Read more...]